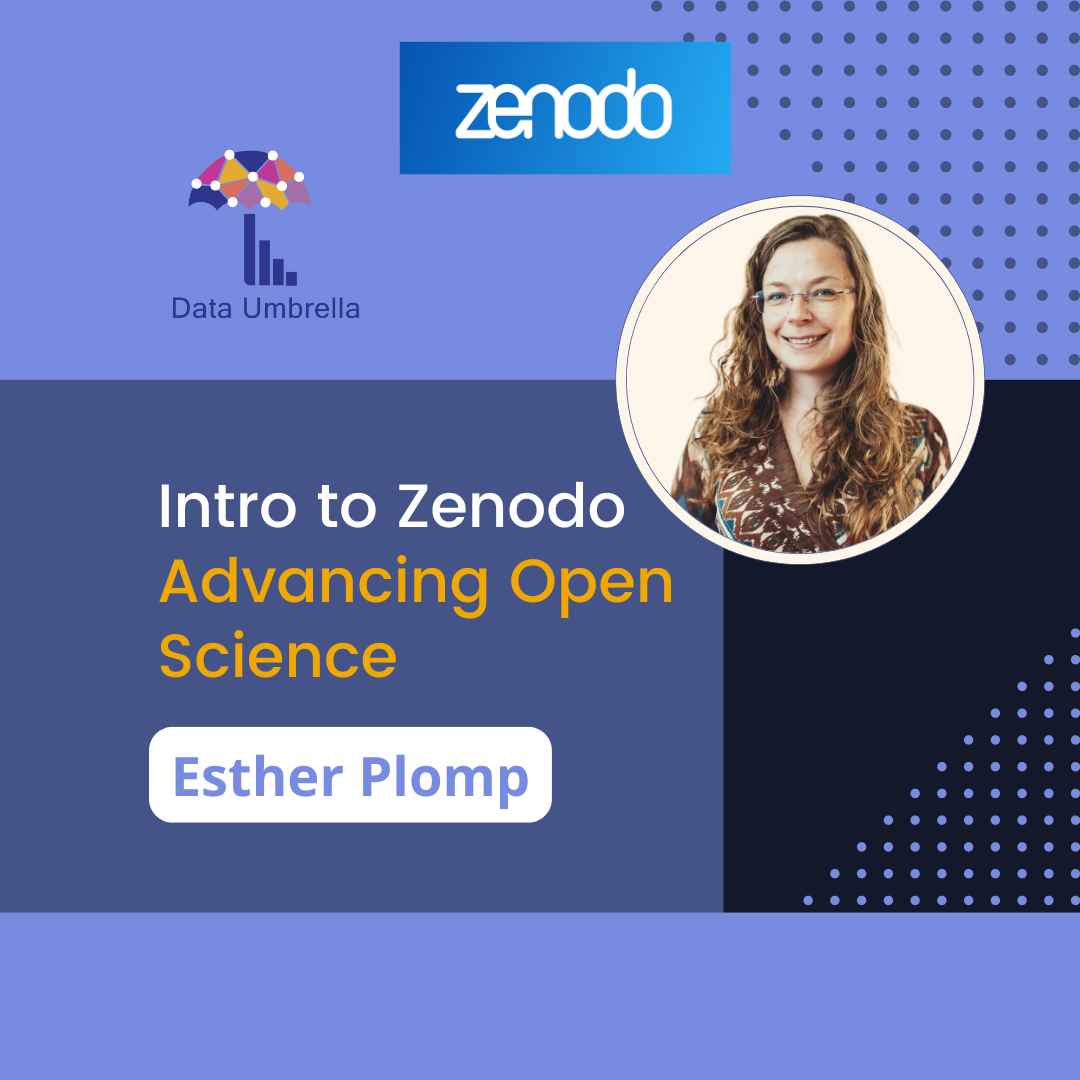
Resources
Videos
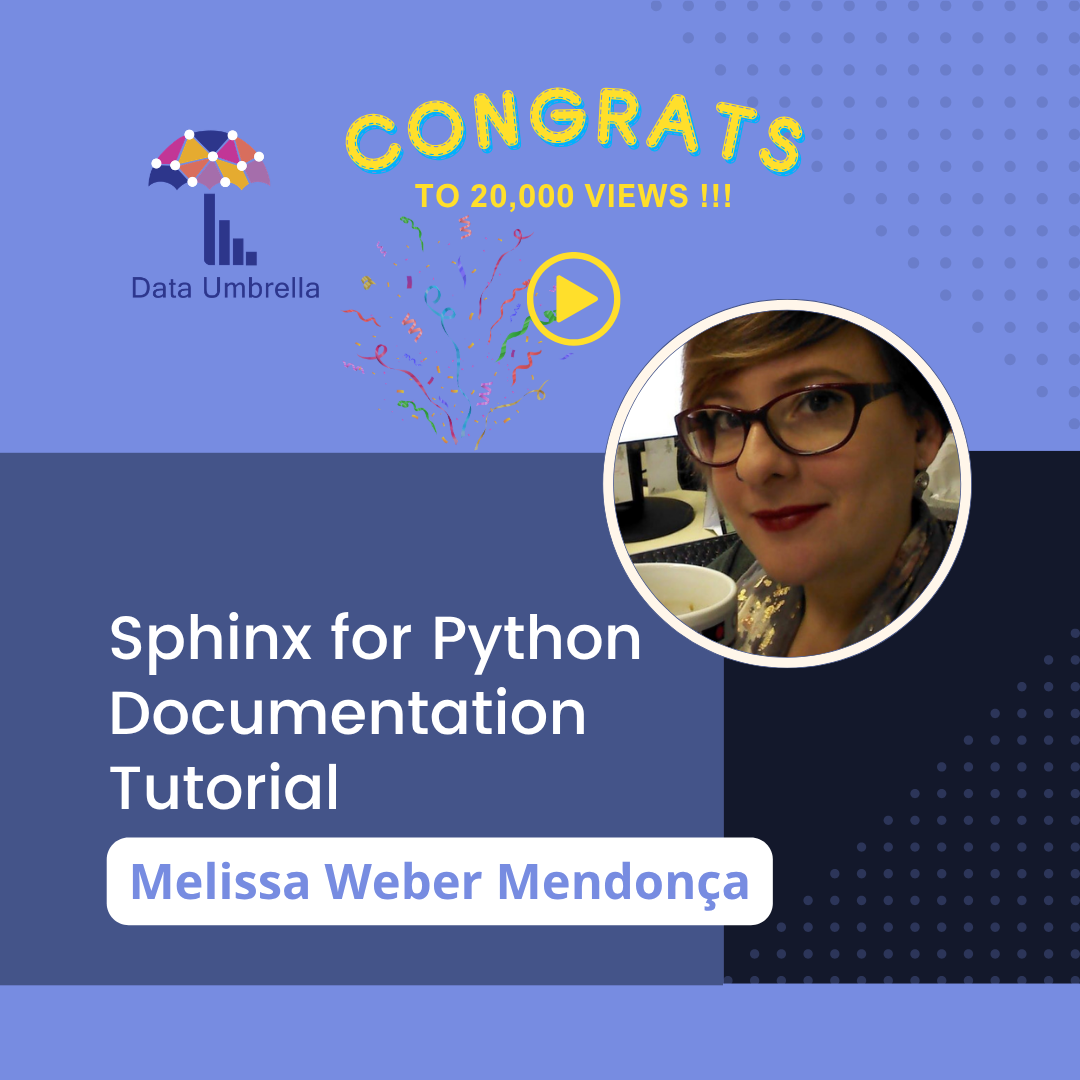
Video Part 1 [110a]: The full tutorial Intro to Zenodo: Advancing Open Science (~75 minutes)
Video Part 2 [110b]: Step-by-step tutorial: Upload research files (documents, datasets, code, etc) to Zenodo (~20 minutes)
Video Part 3 [110c]: What are FAIR Principles? (~2 minutes)
About Zenodo
Zenodo is a general data repository where any research output (data, presentations, research articles, software, and much more!) can be shared and preserved for the long term, increasing their visibility and impact.
Zenodo is derived from Zenodotus, the first librarian of the Ancient Library of Alexandria and father of the first recorded use of metadata, a landmark in library history. It was launched in 2013 by CERN, which is The European Organization for Nuclear Research, and it is an intergovernmental organization that operates the largest particle physics laboratory in the world. It was built by researchers to ensure that anyone can join Open Science. The repository welcomes research from all over the world and all disciplines. Zenodo does not impose any requirements on format, size, access restrictions or licence. “Quite literally they wish there to be no reason for researchers not to share!”
The benefits of Zenodo include
- Being accessible: It is free (up to 50GB per upload)
- Helping researchers receive credit by making the research results citable and through OpenAIRE integrates them into existing reporting lines to funding
- Providing a Digital Object Identifier (DOI) which is a globally unique persistent identifier for your record and is an important for discovery system to attribute citations correctly
- Preserving knowledge: deleted website content (Research shows 25% of web pages posted between 2013 and 2023 have vanished.)
- Sharing content accelerates research, this supports Open Science and reproducibility principles
Connect with the Speaker: Esther Plomp
- LinkedIn: @estherplomp
- GitHub: @estherplomp
Video Outline
00:00 Introduce Esther
01:33 Why use Zenodo?
02:37 Preserve research outputs
03:07 What is a DOI, Digital Object Identifier
04:24 Make research outputs citable
04:51 Disclaimer of “Data available upon request” does not mean data is obtainable
06:52 All the reasons to use Zenodo
08:30 A background on Zenodo (history, location, storage types)
10:34 Zenodo is open source, a general data repository
11:10 FAIR Principles: Findable, Interoperable, Accessible, Reusable
12:34 Licenses
15:32 Using Zenodo over supplementary materials
18:50 How do I use Zenodo?
20:20 Start step-by-step walk through of Zenodo: how to add (or upload) a file
29:15 Q: If you were to upload a paper, dataset and code, would they have the same or separate Digital Object Identifier (DOI)?
43:30 Viewing, editing and making changes to your uploads
45:50 Publishing and versioning uploaded files
50:40 Zenodo Sandbox: place for testing uploads (https://help.zenodo.org/docs/get-star…, https://sandbox.zenodo.org/)
52:02 How to use Zenodo and GitHub
1:01:42 Using Zenodo in research articles
1:04:29 Using Zenodo to share presentations
1:11:50 Resources
1:12:48 Q: Where can we find the images/illustrations used in your presentation?
1:16:16 Q: How does Zenodo prevent people from uploading spam?
1:17:25 Thank you!
Full transcript of Esther Plomp’s Zenodo Tutorial
00:00 Introduce Esther
Reshama:
Hello, welcome to today’s talk. Today’s presentation is Intro to Zenodo by Esther Plomp. Esther is an open science enthusiast and contributes to a more equitable way of knowledge generation, facilitating others and working more transparently. She currently works as a postdoc/research developer at the University of Aruba and is working on an East Science Fellowship project on tracking research objects other than peer-reviewed articles, as well as software, as well as being a Software Sustainability Institute fellowship, on facilitating contributions to open source science communities with a focus on The Turing Way.
Esther particularly cares about open data in the field of isotope archaeology, and she also does some advisory board stuff for open science communities on the side. You can find Esther on LinkedIn. Welcome Esther.
Esther:
Thank you so much for the introduction and thank you so much for letting me talk about Zenodo on the Data Umbrella Series, which I’ve been following for quite some time. So it’s been very exciting that I’m now finally a part of this whole series, so thank you very much. As mentioned, I’ll be talking about Zenodo, why, what and how. So we’ll dive into those details right now. And I like to start any talk by discussing why Zenodo and also perhaps why me. I don’t necessarily work for Zenodo, I don’t represent Zenodo, I’m just a frequent user of Zenodo and a big fan, so that’s why I’m talking about this. I’m sure other people can also talk
a lot about Zenodo, but I’ll just show you why I’m using Zenodo and how I’m using that.
01:33 Why use Zenodo?
But we’re first going to talk about why Zenodo in the first place. And that’s because we don’t like broken links, or at least I don’t like broken links. And I’m sure everyone has encountered them when you’re looking for something on the internet and perhaps when you’re looking for something that you’ve shared in the past. And a four-link is really not what you hope to find when you’re looking for something and particularly not when you’re looking for some of the research data that you’ve been working on for six years. So we don’t like broken links. And I think as scientists it’s really important that we consider where and how we’re sharing our research in a manner that is more persistent than in our heads, behind paywalls or on a computer that can actually crash at some point and then we lose access to all of this data and all of this knowledge. And researchers should really consider this more carefully sometimes.
03:07 What is a DOI, Digital Object Identifier
And a solution to no more crashing computers and knowledge locked up in our head is a digital object identifier. If we share this knowledge online and assign it a digital object identifier, the knowledge will be persistently available because a digital object identifier is a way to persistently make things available on the internet as well as uniquely because every output will have a unique identifier. And we see this already a lot in use for journal articles, but you can actually assign it to any data sets or any research outputs. So data sets, software, preprints, presentations like the one that I’m showing you now. That one actually has a persistent identifier at the bottom of the screen where it also says “zenodo” because my presentation is on Zenodo. And these types of DOIs or digital object identifiers, I will probably say DOI a lot throughout the presentation, but this is what I’m referring to. These DOIs are persistent and unique and they avoid these 404 pages on the web so that you can actually find whatever it is that you’re looking for.
04:24 Make research outputs citable
Another benefit of these DOIs is that it makes research outputs citable. You can see that for publications again we can keep track of who is using what research thanks to these DOIs because you can do it in an automated way because all of this is machine readable. So now you can also, for example in the image, keep track of how software is used by software citations. And another reason why these DOIs are amazing is because it actually makes research outputs available.
04:51 Disclaimer of “Data available upon request” does not mean data is obtainable
We have probably encountered at some point the quote “data will be available upon request”, whether in research articles of others or in complaints on various social media channels from scientists or researchers where they complain that data will be available upon request but not really. There’s actually research being done into this where people are indicating that they did request the data and then concluded that they actually didn’t receive any responses to these data requests for 41% of the data requests. So there’s research in 2021, which is not great. And earlier research in 2014 already indicated that data availability decreases 17% per year and they actually make a very bold statement that says research data cannot be reliably preserved by individual researchers. That sounds a bit harsh but these are not the only two studies that are being done on the topic. So data is actually not available upon request. These types of requests are only successful for 38% of the time and there’s actually lots of research being done about that. And as a fellow researcher I just felt the need to list all of these resources. So this is not something I am making up. This has been researched. Feel free to look up some of these references. We’re not going to go into detail right now because we actually want to get to the points where what do we do?
06:52 All the reasons to use Zenodo
If research data cannot be reliably preserved by individual researchers, what are we to do? And that actually is where Zenodo comes in. Zenodo actually does all of this for you. It’s making your life a lot easier because it ensures that outputs are stored persistently, that they become citable, and that they’re available on this platform. So it’s an amazing platform and I’ll explain a little bit about why you should use Zenodo in their own words. So this section is actually copy/pasted from their website or their platform.
Zenodo is safe. It’s safely stored for the future in CERN’s data center. I’ll talk a little bit about what CERN is in a bit. It’s trusted. Again, citable. Every upload is assigned this digital object identifier that I talked about in one of the first slides. So everything is citable, trackable. There is no waiting time. So you can make an upload as soon as you hit publish and then your UI is available within seconds. Sometimes it takes a little bit longer. But generally, this is almost instant. You can make it available open or closed. So it’s also for more sensitive data if you put it on the restrictive access. You can also version data sets or fonts. So you can upload new versions and indicate what modifications you’ve made. There is a GitHub integration and we’ll talk about that later as well. And you can see a bit about users statistics if you use this platform. So that’s why Zenodo.
08:30 A background on Zenodo (history, location, storage types)
Now I want to go into a little bit more about what is Zenodo. So Zenodo is built and developed by researchers with the main aim to ensure that everyone can participate in open science. It was launched in 2013 already. So it recently had its 10th anniversary, which is why you see this nice logo with the candles on the slides. And it’s managed by CERN. So I mentioned that before, which is the European Organization for Nuclear Research. And that institute is based in Switzerland, so Europe. And the name is actually amazing. It’s derived from Zenodo, which is the first librarian of the ancient library of Alexandria and the father of the first recorded use of metadata. And that might not tell you a lot, but as like an almost librarian, this is amazing. It’s a really great name for the platform that they offer. And Zenodo is very inclusive in the sense that it’s welcoming research from all over the world and from every discipline. So it’s a general data repository. And the only requirement for that is that it needs to be necessary to understand the scholarly process. So perhaps it’s not suited to put your cat videos on there unless you’re studying your cats and you got ethical approval to do that. But anything related to the scholarly process is very welcome.
It’s also free for uploads up to 50 gigabytes. And they are also open for debate or discussion about bigger uploads. So you can also reach out to them if that is needed. And Zenodo also doesn’t impose any requirements on the formats, the size, the access restriction, so you can share it openly or close, or the license. And we’ll talk a bit about licenses later. So it’s very up to you what you’re doing on Zenodo.
10:34 Zenodo is open source, a general data repository
And I would just also like to highlight that Zenodo is actually open source. So the code is open source. It’s built on Invenio, which is also open source. And everything is shared openly on GitHub. And so they also invite contributions to the platform. And so that’s another amazing thing about Zenodo. So what is Zenodo? Zenodo is a general data repository. And a data repository is a place where digital objects, such as research objects, can be stored and shared with others. And it’s in compliance with the FAIR principles.
11:10 FAIR Principles: Findable, Interoperable, Accessible, Reusable
And if FAIR is the first time you’ve heard about that today, I’ll briefly explain FAIR. It’s an acronym for Findable, Accessible, Interoperable, and Reusable. So it has not a lot to do with FAIR in the sense of ethics, or FAIR as an equal, and so forth. But it’s an acronym for these terms. And I’ll explain very briefly what each of them mean. So data can be findable when it has descriptive metadata, so information about the data, as well as this persistent identifier, such as the DOI that we discussed earlier. It is accessible when it is openly available, or there is an authentication process or procedure in place so that people don’t necessarily can access it immediately, but there is a process in place so that they eventually can access it if they fulfill the requirements. So that’s also the restricted access option on Zenodo. And data is interoperable when you can integrate it with other data or applications and workflows. And it’s reusable when it’s shared with sufficient documentation explaining what the data is about, as well as a license.
12:34 Licenses
And I mentioned license before, and I think I owe you a bit of an explanation, because it’s not always clear what a license is, but a license is a formalized agreement of what re-users can do with data and software. And so if something is openly available on the internet, it doesn’t actually mean that you can just use that for any purpose that you like. That’s actually quite the opposite. If the output doesn’t have any license, it means that all of the copyright is still with the original owner, and you would actually need to ask them for permission to do whatever it is that you’d like with the research objects. And so licenses are a great way around having to email everyone and explaining in detail what it is, what they can’t, and what they can do with data and software. And instead, you tell them that from the start, so people immediately know what they can do with the research output. And I won’t go into too much detail, but software and data have different licenses, which you can choose from. And I’ve listed a software license chooser and a data license chooser, or the open data commons, which you can explore to see what license best fit your needs. And for that, you always need to be considering whether there’s any requirements placed upon you. And if you are really free to choose a license, so it’s a model that lets you choose any of the pre-existing licenses. But perhaps you have a funder that wants you to choose a specific license, or a collaborator with a very strong preference for a particular license. And in that case, you should probably listen to that as well, instead of just making your own choice. So that’s licenses.
And data repositories support with choosing these licenses and support with making data fair, because they generally assign these persistent identifiers. They have metadata fields, some of them required. So you actually need to provide some information about the data before you share it. They provide a record or a landing page that people can actually access in order to get access to the research outputs. So they really support making all of these research outputs fair. So data repositories are great. And also just a disclaimer that we’re talking about, Zenodo today. But Zenodo is not the only data repository available. So sometimes it’s more helpful to use a discipline specific repository, because then that’s more specific for your type of data that you’re working with. So you can find out about other data repositories by, for example, checking out re-tree data or fair sharing. But today we’re focusing on Zenodo.
15:32 Using Zenodo over supplementary materials
And before we go more into depth about why Sonoda, how to use it, I just want to go into a question that I frequently get asked by researchers. Why is it not sufficient enough to just put all of the data and software in the supplementary materials of my research article? Because then it’s available, right? And there’s even a license associated with it because it’s the same license as the research article. And the first rebuttal to that is that not all research outputs are always associated with a research article. So data repositories can also be used when you don’t necessarily have a research article, but you just want to share a small subset of the data or a script that really helps you, but you can’t really write a software article about it.
Sometimes the publisher actually requires you to use a data repository instead of the supplementary materials. And another thing about supplementary materials is that you actually give up a lot of the control that you have over data. Because just like publications, once you have an update, you can’t really update the publication anymore. So then you would need to write a new article, or you need to make a new data article, etc. So you can’t really update that yourself.
And I will show later how you can actually update an existing research output on Zenodo as well. Then a more of a data stewards answer to this question is that, yeah, research is not just about research articles. Data and code are also primary research outputs. So they really shouldn’t be hidden away in the supplementary materials. And this is quite literally hidden away sometimes. Particularly when articles are published behind the paywall, it’s very difficult to then also get access to the supplementary materials. And that’s not great for availability, and particularly not because supplementary materials themselves don’t have this persistent identifier assigned to them in the majority of the cases. So that means that it’s actually liable to being lost or to have broken links in order to access supplementary materials. And sometimes it is also not great to use the supplementary materials if there are restrictions in place about which file formats or which sizes you’re allowed to use. So sometimes data repositories like Zenodo are more inclusive of all of these types of file formats. And so that would be better to use in some of these cases.
And if you’re still not convinced, I would say that it’s not in accordance with FAIR principles primarily because of this, there’s no persistent identifier associated with the supplementary materials. So it already fails at the findable part of FAIR. Yeah, so plenty of reasons to not use the supplementary materials for this. Although I suppose that using the supplementary materials is still better than saying data is available upon request. All right.
18:50 How do I use Zenodo?
Now that we’ve discussed a bit about why and what, I want to go into how do I actually use Zenodo. And for that, I’ll show this on Zenodo itself as well in a bit. But you do need to make an account which they made very easily. You can sign up with an existing GitHub account with Orkits, or you can also sign up with an email so you have some options. I would personally really recommend that if you don’t haven’t yet and you’re researcher set up an ORCID ID, because this is a persistent identifier for you as a researcher. And it makes logging into a lot of scholarly system platforms, etc, a lot easier for you. So it’s not just making your research outputs more findable for yourself, but also very much improving your life in terms of accessing all of these systems. So I’ll sign in using ORCID in a bit. But do sign up yourself for an ORCID if you haven’t done so yet. All right. Then I’ll show you how to create a new item. So I’m going to stop sharing my presentation and hopefully still sharing my screen. Let’s see. Can I see that? I think I’ll just re-share, just to be sure that you actually see my browser.
So this is the homepage of Zenodo. So here you see, again, this block about why should you use Zenodo. So that’s the exact same information. I just copy-pasted that in my presentation. And here you can see recent uploads. So if I click on this, I’ve never clicked on this before, but apparently this is something about Brazilian flora. So this is a dataset I assume about flora, which is very exciting. We won’t look into that too much, but this is actually already a very nice example about how you can actually version these different versions of this research data, actually. You see this is version number seven already. So they’ve been working on this for quite some time, I assume. And you can actually browse in between all of these versions, which is very nice. And then Zenodo will also let you know, like, hey, there’s a newer version of this record available, but you can still access all of the previous versions as well. So here’s the older dataset. I can go back in time. They named it exactly the same. You can see all of the versions that will take you to a different page. But if I scroll down, let’s see, when did they start the project? 2014 August. Very nice. And so you can download each of these versions. If you press the download button, sometimes there’s also previews, then you can see that a little bit more. But this is how a record looks like once you’ve published it on Zenodo. And you can see that you can also see how many times people viewed it or how many times people downloaded it. So it’s quite a nice way to keep track of what it is that is happening to your research outputs.
Reshama:
Esther, in the views and downloads, what’s under show more details?
Esther:
Let’s go there. A little bit more detail about this version, apparently, which is very cool that you can distinguish if the views are for this particular version or whether it’s accumulated. Very cool. We can also maybe press this one. So here they explain a little bit more about what they actually track. I’ll skip that for now. I think it’s just indeed a unique view, visiting person or a robot. But yeah, it doesn’t work to reload the page hundreds of times of your own research objects and then see what happens. So for example, if I refresh now, then that doesn’t mean that the views go up. So it’s a little bit more robust than just me refreshing the page a hundred times. Yeah. All right. So this is how it looks on Zenodo. And right. Let me log in first. So log in is here. And if this is your first time sign up, this is the sign up page as mentioned. So you can see that I use both an email of the data stewards at TU Delft where I no longer work, unfortunately. So I shouldn’t access that. Instead, I will use the ORCID’s. So this is how the sign up page looks like. Because I already signed up, I’m going to go back to Zenodo and use the login button instead. And so here you see, again, very similarly, I can sign in with ORCIDs, GitHub, or an email address. But I’ll use the ORCIDs’s since I’m no longer a data steward at Delft. So here you see my ORCIDs. So that’s a number string. And I’ll use that to sign into ORCIDs. And then I’m signed in to Zenodo. And you can see my username here or my email address.
20:20 Start step-by-step walk through of Zenodo: how to add (or upload) a file
And in order to make a new upload, I’m pressing this plus sign. I’m selecting new uploads. And then if it’s both, you see this interface. And what you see here is that you can drag and drop files or use the computer or the, how do you say that? Not sure. You browse in your computer to get to the file. So it’s quite easy to get a file onto Zenodo. And they start with some basic information. And what you’ll notice is that some of these basic information questions have red asterisks behind them. And that means that these fields are mandatory. So if you try to publish something on Zenodo while not filling out these fields, Zenodo will let you know, like, hey, this is a mandatory field, you should fill this in. And here you can see the question, digital object identifier, do you already have a DOI for this upload? So sometimes when you share a version of a research article, for example, it could be possible that you already have a DOI. And in that case, it’s better to use the existing DOI because otherwise we have multiple DUIs for the same types of research outputs. And that’s not very helpful because then you have multiple things in multiple spaces. And it will all be going very messy. It’s also more difficult to keep track of how things are reused. So then you can copy paste existing DOI here. Or in the majority of the cases when I’m using Zenodo, I say, no, I need a DOI because I don’t have one. And then I can press this button here for getting a DOI now.
And I am not actually going to upload this file. But you can just request a DOI. And that will also be visible in the browser where you see the same number as is listed here. So now it’s already saving what it is that I’m doing. And I can use this DOI and it will be stable until I delete this record. And then, yeah, someone else can probably reuse my DOI if I delete it. But this is nothing. Nothing is published yet. So nothing is official yet. But we’ve reserved this DOI. I’ll get back to that at the end of the presentation as well, how you can use that. Then it’s asking about research type. So you can upload a data set, event type, related information, images, lessons, presentations, physical objects, lots of options here. Lots of different types of publications that you can also share here. And so lots of options. And if you’re not sure, there’s always the option other. So I’m going to go for that right now. And for my title, I’m just going to say test one, which is a very uninformative title. And as a data steward, I should warn you that this is not the best title to use.
But just for you to see what’s an order looks like, I’ll use test one. The publication dates, it automatically sets it to today. You can change that. So it uses the year, month, and day formats. I will keep this the same for testing purposes. And then it is asking about creators. So here you can I can add my own name. So that’s Plomp and Esther. If I use my ORCIDs, I would need to copy paste that. And you can add your affiliation, as well as your role in the construction of the research output. So for example, I’m the data manager of this research output. So I’ll skip my ORCID for now because I unfortunately still don’t notice from the top of my head. But I would recommend you to add your ORCID here for actual purposes of creating a Sonoda output. And so that’s what it looks like now. So creators, it’s Liz myself, and you can just add creators. There’s also a save and add another creator in this add creator form. So you can add lots of creators, which is very helpful if you’re working together with a lot of people.
29:15 Q: If you were to upload a paper, dataset and code, would they have the same or separate Digital Object Identifier (DOI)?
Reshama:
Now, I had a quick question. If you were to upload, say, a paper, data sets, and code, would they each have a separate DOI or would it be under one?
Esther:
It depends a little bit. I would recommend you to have separate DOIs for data sets and code unless it’s… Yes, it’s really dependent on your own preferences. So your publication gets assigned a DOI anyway, so it’s important to keep that the same for the publication. But I would assign a different DOI for, for example, the data and software together if the software is very closely related to the data and it’s underlying a research article. And you don’t really plan for the software to be reused in other purposes, if that makes sense. So then it can make more sense to put data and software together. But in some of the cases, it makes more sense to also split those apart also because I mentioned that data and software use different licenses. So then you would need to attach two licenses to the same upload if you’re uploading them together. So it can actually be easier to upload them separately so that you can share the data, provide context about the data, choose a data license, and then for the same for software that you…
We will go about how, especially if you also share it via GitHub, it might be easier to have the software as a separate output, if that makes sense. And then it is important to link them all together and make sure that all of these DOIs are referred to in all of these separate uploads and that you can actually do using Zenodo as well. If you scroll down a little bit to the related works, you can also add, for example, that this one, this research outputs is supplemented by another research output. And so you can enter the DOI here. I’m not really sure which DOI that is, but it’s a DOI. It’s a DOI. So we’ll add that here for the scheme. And then here, I can also indicate what is it? Is it a presentation? Is it software? Is it data, et cetera? So then you can all put that together and everything is linking to each other. And that’s also a very important thing, your research article. And since you’ve mentioned that, maybe I should go to that slide for the presentation already. Yeah, no, let’s do the upload form first and I’ll get back to that.
How do you link them all together in the research article as well? But you can link them all together on Zenodo. So that’s in the related works section. I hope that makes sense. Please do interrupt me if I’m not making any sense. Scrolling. Yeah. No, I was going to say, that’s a great explanation. And I see now that the datasets can be connected to the paper. So thank you. Yeah, yeah, exactly. So that’s actually where my eScience fellowships project comes in. It’s a lot of frustration about how people do not connect all of these different research outputs. And then it becomes really difficult to find all of your research outputs, especially from an institutional perspective, then we have no idea what it is that you’re doing. And we cannot count it. But also for people trying to find the data underlying a publication. If you don’t actually share in the publication where you’ve stored the data, where you’re sharing the data, then it’s almost as bad as data available upon request because then people need to search and look for these datasets everywhere. So it’s very important indeed to bring that all together to increase findability of these datasets yourself. Yeah. So back to the upload form. So the basic information is the section which is most important. So we’ve already set up the digital identifier research type, the title, publication date, and the creator, which is myself. So those are the mandatory fields. So those you need to fill out. But then it’s also very helpful to add a short description. So for example, this is a desk deposit. So there’s a very short description, not super helpful. But hopefully I’ll remember in six months time that this is my test deposit.
And then what you see here is the license section. And so what you see here is a creative commons attribution 4.0 international. And that means that anyone who will come across this work can then redistribute and reuse this work as long as the original creator is appropriately credited. And what that means is just that you cite the original work, you refer to it in the redistribution. So it is quite similar to a research paper. You don’t just take someone else’s conclusions and claim to measure on, you refer to the original publication where they mentioned this first, or at least you should. So that’s this particular license. So they already assign you a license. That doesn’t mean that you need to keep this license. It’s one of my favorite licenses. So I’ll keep it for now. But you can press the edit button. And here you can choose between several licenses. And these, all of them, starting with creative commons are actually data licenses. And all of these other ones, Apache and MIT, for example, those are for software. And so in these descriptions, you also see a bit about what it is that they require you to do and whether it is for software or not. So for example, this one from the creative commons actually says not recommended for software. So yeah, different licenses for data and for software. So I’ll keep it as it is for now, because we can do a whole different presentation about licenses. But I’ll skip that for now.
For now, I’ll continue in the upload form a little bit, because they let you add a lot more extra information. And so particularly keywords and subjects is very important. If people are searching in the search button on Zenodo, etc., that you actually put some information here. So for example, fare, I press enter in order to get that shown up as a keyword. I do a little bit of data management things. Again, enter. And then you can also select three existing keywords. Language can be helpful. My majority of my outputs are in English. So I’ll select English for this, even though it’s a test output. So you can basically select any language. And I can select a date. I’ll just use the date, which I already used. So that will be 2025, 14 of February. And it is available on this date. I can add a version. So for most of the outputs, that might not be relevant. But again, if like the Brazilian flora data set, you need to assign a particular version to the data set. You can also do it here. And publisher Zenodo, or if you are sharing an existing research article, then here you might have to change the publisher. You can add information about funding. So if you have a funding agency, recommend you to add that information here.
It can also be done using persistent identifiers nowadays. There’s alternative identifiers. If your research output also has different DYs associated with it, we can link it with related works, which we just did. So you can say that your data set is a part of a research article, or it’s part of software, or the data set is another version of a data set. So there’s lots of relations between these DYs that you can have. You can also add any references that your research output has separately here. That’s recommendable because then it becomes machine readable.
Whereas if you put it in a PDF file, Zenodo does not take that up and then makes that automatically available in a machine readable way. So publishers do this for you. Zenodo does not do this for you. So it’s helpful to do this yourself. Here they particularly ask about software. So you can link to a repository, which language you’re using, what the status is of the software project. But also the publishing information. If this is for a journal, you can fill out all of these details regarding where it’s published, which volume, what is the book chapter, etc. And if it’s a thesis, which university it’s been awarded for. And it also means that if this is not relevant, so you can’t have both information about software and about publishing, etc., you don’t need to fill it out because there’s no red asterisks behind it. So if any of this is not relevant for you, you can just skip it. So for the test, I’m also going to skip it. Conference, if it’s part of a conference. And you can also add more information about which fields you are working in.
So I’ll skip that for now, because there’s so many field options. But there’s really an opportunity for you to really fill this out as detailed as possible, which will enhance the findability of your research. All right. A quick question. Can you go back in, for example, if we forget to put in the conference that a content was presented at, can you go back and add it later? Yeah. Yeah. So, yeah, no, it’s great. So if you want to fill that out later, you can actually do that. So the only thing that you can’t edit once it’s been published is actually the file that you’ve uploaded. So if you want to make any changes there, you can. But then it will be a new version of the record. But all of the metadata information, that you can actually change later. So it’s not too bad in that sense. I can show you for a different output in a bit. For now, I will just save this draft. And I will show – I already didn’t do some things. Yeah. So I screwed something up with the date. Please provide a valid date or an interval. So I probably should have put an ending in that date file. And I didn’t upload any files, which I won’t be doing. So it’s saved, but it has some errors. So it’s a note that will let you know whenever you need to improve some of your upload information. But for now, because I want to move on to making changes and making sure that you see how this looks, I need to fix that before I can do the preview. Let me see if I can remove the dates. I think the issue with the date is the formatting, I think. But I haven’t done this before. So I don’t know.
I’ll remove it for now and I’ll see if I can get to the preview. No. I need to upload a file. Okay. I will – well, we already looked at an existing upload. And then I can show you what it looks like if you try to update it. And as mentioned, visibility. Also, red asterisk. It’s on public automatically. But you can also put it on restricted. So – or you can apply an embargo and then you need to fill out the date in the correct format until the embargo lasts. And then it can – I think it will be automatically lifted. But similarly to other changes, you can also extend the embargo if you change that date. Yeah. Normally, you can make your research outputs publicly available. So I’ll select this for now. I’ll save it. What that looks like in your dashboards. So moving to my dashboard now. Something like this. So I already have some uploads. So it looks a bit more populated than if you’ve never used it. So this is where you can go back to your uploads. So this is my test one, which is a terrible name again.
But if I click on it, I can then go back and make any changes. And again, this is a draft. So no one else will see this. Here you can see there is a draft. Going back to my dashboard. Then here you will, for example, see one of my more recent uploads. A data management plan and section templates for the faculty that I worked at. And so here, if I want to edit any information. So for example, this link is not clickable. That’s not super helpful. So let me see if I can edit that using the edit button. So only I can do that because I created this record. So this is not something that you can do for other people’s outputs. Because that would be a mess. So we’ll select edit. And then we’ll go into the same form. But here you can see I’ve uploaded some files. And all of this information is already filled out. Now let’s see if we can actually make this link linkable. So I’m pasting the URL here. And I want a new window for that. I press save. And then now that should be linkable. So I think that’s the only edit that I want to make. I’ll just press save draft. And then I’ll do publish. Let’s see what happens. And here you see this warning, which we’ll see again at some point as well. Which is asking you whether you’re sure you want to publish this record. Because once the record is published, you will no longer be able to change the files in the upload. So again, the files. Yes. Can we see the preview first before you publish? Yeah. Let’s see if it works for this one. Yeah. So no longer be able to change the files. So that’s what it’s warning me about. Let’s go to preview, indeed.
So here it says I’m in preview mode. You are previewing changes that have not yet been published. So it looks almost the same as the page that it would have normally. And that we previously accessed. But here you can already see this is the change. I can now if I click this link, it’s actually a link. And people don’t have to copy paste that. So it’s displaying the change that I’ve just made. And everything else just, yeah, it looks the same as it would look like whenever you’ve published it. Let’s go back to the edits. All right. Okay. So try to publish this now. Again, the warning. No longer be able to change the files. However, you will still be able to update the records metadata later. And that’s exactly what we did. We updated the records metadata. So if we now publish, then here we can see this change in the link. And again, it looks almost the same as the preview version. Other than that here, you can now see the added a new version buttons. And this is still the same version. So it’s still version one. Because I didn’t touch any of the files. So you can just very easily adjust any of that information without it having an effect on the version of your file. So it will have an effect if you update the files. Let’s see if I can get to one of my – so I’m moving to my dashboard again. So this looks different whenever you upload a new version of the files in your uploads. And so here you can see the date and the version. So I have a lot of version ones in all of my files.
But here we have a tree. So I’m going to assume that this has three versions. I know. I mentioned that this is a version three. Because it’s actually based upon a previously set up guidance document. Which I should hopefully also indicate in the related works. Yes. So I indicate it here. This is actually an alternative version of a different output. Which is also on the node-own. So this is how you link them together. And if I link click to this. Then this is version one. I actually called my previous version version three. Because, yeah, we made multiple iterations of this. So this is how you conversion things. I did that because it’s quite different. And the contributor authors were quite different. So that’s why I made a separate upload. But going back to my dashboards, there should also be an upload where I use the same uploads. Let’s see.
Yeah. So as you see, the majority of the times you just have one version of your output. Particularly if this is slides. Aha. But this one has four versions. So we’ll go to this one for now. So this is a data carpentry lesson on spreadsheets. I’ve done that a couple of times. So I have multiple versions. So version one looks like this. And I use completely different slides, I think, in this version if it loads. Yeah. So completely different slides. Quite old. Old picture, et cetera. And each of these versions, as you’ll see, has a different DOI. So you can link directly to this different DOI for each of the versions that you have. And if you use that DOI, you get directed to that particular version. But it’s also possible to use this overarching DOI. Like an umbrella DOI of some sorts. And that’s listed here. So if you want to cite all of the versions, you can use this DOI. So for example, if we use that one, you get automatically redirected to the latest version of the record. Also, if I now upload a new version, version five, then it will automatically go to that one. But if I want to link to a particular version, because I want to mention this version to my course participants for this particular course in 2021, then I should be using one of the older DYs. And you can just copy that link from these different versions. And you’ll also see that I used these links in the presentations themselves. So here I didn’t use the overarching DOI link. But for example, for a data set, that might make more sense. Or again, up to your personal preferences. So that’s what it looks like when you edit things and you actually edit your file and you get a new version. All right.
Yeah, let me check my presentation in terms of did I cover everything that I wanted to cover. I think you can see my slides as well. We created a new item. We did the basic information. Right. So now I showed you a test upload. And I – let me see if I can stop sharing and also reshare this screen. So I showed you a test upload that I didn’t upload. And I made an edit and an existing work that was actually already uploaded. But I didn’t share a new one yet.
The Sandbox Environment
And I can imagine that it’s also very daunting to upload something for the very first time if you’ve never used Zenodo. So there is a way around this. Zenodo has a sandbox environment, actually, which you can also use. So I won’t be using that for today’s webinar. But if you’re very scared about putting something online permanently for the very first time, you can use sandbox.Zenodo.org. And just have a go and see how it feels. But when you go to the sandbox, it’s also saying that it’s only for testing purposes. So anything you do on there will actually not be assigned an actual DOI. And no one will be able to see that, which is the whole purpose of the test service. But so if you then want to really upload something, you would have to do it again on the real Zenodo version of the platform, the actual version. Yeah, this is a nice way for you to get started if you’re really scared about putting something out there online. Okay, let’s see. Yes.
GitHub and Zenodo
So the next thing that I wanted to discuss briefly is how do you actually use Zenodo and GitHub together if you want to share some software. And that is important to do because again, putting software on GitHub alone is not following the fair principles in the sense that GitHub does not assign a DOI to your research output. And it’s also not a great place for long term preservation, because you can decide to just delete your GitHub repository at any moment, or perhaps Microsoft will decide that your repository has some type of word that they don’t like in there, and then they might decide that they will delete it for you. So it’s important to use GitHub alongside a data repository to ensure long term preservation of your software. And so it’s quite easy to use Zenodo with GitHub. I’ve linked to a couple of guides and a video that also explain it in more detail if you want to see that. But we’ll go over it in a little bit in this webinar as well.
So for you to use GitHub and Zenodo integration, you would first need to link your accounts. So in the menu, and let’s see. Yeah, I’ll share my screen again. Sorry about that. I pressed this game. So I will show you how that works on Zenodo as well. Let’s see. So if I now go to the top right menu, so where your profile or your email is listed, you can see linked accounts here as one of the options, I go there. And then for me, you will already see that I linked my accounts to GitHub and ORCIDs. So I’m connected with both of these services. Not with open air, I’m not actually sure what that actually does. So I’ll skip that for now. But I’m connected with GitHub and ORCIDs. But if you do this for the very first time, you will need to select the service. So I, for example, if I do that for open air, I’ll probably get directed to their platform, and then I’ll need to indicate or log in in order to integrate my accounts there. Yeah, so I should sign in with GitHub or ORCIDs, for example. I won’t do that for now. But this is how it would look like for GitHub as well. So you will be redirected to GitHub. And you need to make sure that everything is connected. Before you can now go to the menu, select GitHub. So again, menu GitHub. And this is how it looks like once you’ve linked your accounts. So you see this big header where it says get started, flip the switch, create a release and get the badge. So this is their way of the three step process that you can you can use using Zenodo. So what they mean with flip the switch.
So here you see a couple of repositories of mine that have already been published on both GitHub and Zenodo. So if I switch this flip on or off, that means that if I then publish a release on GitHub, so you don’t actually use Zenodo for that, but you use GitHub to publish a release of a new version, then it automatically will get pushed to Zenodo. So for example, if I now publish a new version of this figures, and the data on GitHub, then it will also automatically publish a new version on Zenodo because I have this switch flipped on, I can also turn that off at any point in time. And this could be because you don’t want all of the versions on GitHub archived on Zenodo. And again, that’s up to your personal preferences. If you don’t want 50 versions of your software on Zenodo and only major changes, then you can slip it off. And then at any point, you can flip that back on. So that’s you’re fully in control of that. Here you for example, see some of my repositories below which are not switched on. And I can then switch those on at any point. And then whenever I’m reloading the page, it says, please reload the page. Then they will be listed here. And so here you can see that this one is not yet published on Zenodo because it doesn’t have this batch yet. Whereas the other repositories do have this batch.
I’ll turn that off for now because that’s not something I would like to put on Zenodo. But yeah, you get a batch. And how that looks like on GitHub. So going to this repository on GitHub. So this is the homepage of the repository. So here you see again, this this DOI batch that I put it there. So you do need to do that manually. But you will see that. Yeah. It has one release. So I literally only wrote a release for this repository. So it would go on GitHub. So if you go there on releases, let’s see, should be able to make a new one. We go back to releases. If I draft now a new release, I can put a release title, write some descriptions about changes that I didn’t make. So we’re not actually going to do this. And then here I can publish the release. And then any changes that I’ve made in this GitHub repository will also be pushed to Zenodo. Right now I don’t have a really good example for code. So I won’t be doing that.
But that’s how that would work on GitHub. So you need to go to the releases and draft a new release. But for now, I won’t be doing that. Because I don’t have a new release of this code because this is my PhD research. And I hope to never touch that again. No, just kidding. But yeah, in order to get this batch on your readme page, you can use markdown text to just add the batch to your readme. And Zenodo is very kind with that. You can actually, if I go to the Zenodo page of this output, so here’s what it looks like on Zenodo. So it doesn’t provide a lot of information. So this you need to edit the Zenodo page yourself. But this is what it looks like from GitHub. So all of the files from GitHub are there. And yeah, and it looks quite similar to the deposits that we’ve already seen. You see me as a creator, etc. But in order to get this nice DOI button, we can go a little bit below. Here you see this DOI button. If you press on it, then here you see the markdown text. So you don’t need to remember anything. You can just go to this DOI button, copy paste the markdown text or just the URL or the HTML output if that is needed. Copy paste that and then put it into your readme file. And then you have this nice button.
On your GitHub repository. And then because I apparently did very well, I also made the citation file. So here you can see that adequate citation. I actually did this very well. I’m impressed by 2021 Esther. So I’m pasting the URL, for example, but also the DOI from Zenodo. So here for the citation, it’s very important to add in the DOI because otherwise it becomes less trackable. And all of the author information is there as well. And if you want to learn more about citations, CFF, there’s more information on The Turing Way as well. But if you create a new file in your repository, let’s see. Yes, I’m logged in. Great. If you do a citation.cff, yeah, it should provide you with a template and then you can insert that example and then you can fill out all of that information. And then here they also use a template Zenodo DOI, but that’s how you then use that by copy-pacing your own DOI in there. And they also pre-fill some of the information so you don’t even have to copy-paste everything. Which is probably why that URL is there for me. Right. So I think that’s all I wanted to show for GitHub and Zenodo.
Yes. So the slides also contain a bit of examples of how that then looks on Zenodo, et cetera, because we actually just went through the whole process. I won’t be going over these slides, but just for your reference, I also describe again how you can copy-paste this DOI button. But for now, I wanted to go to the point made earlier that it’s very important to link all of these research objects together. And so hopefully you still see my screen and the presentation. But yeah, how do you then actually link all of these data and codes and research article together, because this is all over the place and very confusing. I referred earlier to The Turing Way about the citation CFF file, but The Turing Way also has some information about how do you now link all of these research objects together. So you can go there for a bit more detail. But the best way to do this is to do things.
1:01:42 Using Zenodo in research articles
Publications nowadays have a data availability statement or software availability statement, where you can say, well, the data is underlying the research article is available on Zenodo, and here’s the DOI. And then it becomes very important that for two, you also put that DOI to your data set in the references, because otherwise we cannot automatically pick up that you shared the data and we can’t automatically link from the publication data to the other research outputs. So please, please cite your data and your software outputs.
Also, if you reuse other people’s data and software outputs. So it’s very important to do that. And what that looks like. So this is a very nice example, where they say, actually, we don’t have additional data available for the article. So all of the data underlying the results are available as part of the article, which is perfectly fine. Not every research article needs data, but they do have a great software availability statement. So here they say that software is available from by a conductor platform. It’s a package. The source code is available from a GitHub link. And they archive the source code at the time of the publication. So they really indicate this particular version of the code on GitHub is available on Zenodo. So what we just did, we released a particular version on Zenodo. And then they cite it because the 26th at the end is actually the reference to their own software. So it’s both available in this software availability statement, as well as in the references. So this is perfect. This is more than perfect because they also list the license. So now you know exactly what it is that you can do with the software, which is a lot because the MIT license doesn’t place a lot of restrictions on software use. So yeah, you can have a look at this example on the link from the DOI in the slide. And yeah, please, please, please do link all of your research outputs together.
1:04:29 Using Zenodo to share presentations
And then one of the last things that I wanted to share with you is how do I use Zenodo to share the presentations? And this is also something that I’m currently doing and what I would like to show again. So we reserved the DOI when we were in the upload form in the basic information. This is one of the first things you do actually, where I said, no, I do not have a DOI yet. I need one. And I press the button, get a DOI now. You saw on the upload form how it magically appeared. And then I can use that DOI. So what that means, and what you also saw, is in that upload form, I didn’t need it to put any files in there. So Zenodo complained a little bit about there’s no file here and we can preview it. But you don’t need to put a file in the upload form in order to already get that DOI. So that means that you can copy paste that DOI and put it into your slides or put that DOI into your research article before you already publish the data and the codes. So that’s why reserving this DOI works really great to combine all of these research outputs, but particularly for presentations. And just a note that I wanted to make, because in the presentation, you also see just the DOI and not the link in front of it. So if you just copy paste the DOI and not the URL, it’s not a link. But I don’t want to put the HTTPS/DUI.org in front of all of these numbers, because then it’s longer, it takes up more space in my presentation. So I embed that link into the DOI.
But just to keep in mind that if you add the DOI.org in front of your any DOI, it will automatically go to the landing page of the DOI. And so it is also important to make sure that if you’re presenting your slides, to make sure to have that difference there available before people just start typing over the number of the DOI, etc. So it’s not a direct link unless you put that DOI.org in front of it. All right, so I reserved this DOI for the presentation. So if I now go to this link, because I reserved the DOI, it comes to this page where it says, “DOI is not found.” That’s because my presentation is actually not shared yet. So we’ll go to that now. I’ll go to some nodal. Yes, I’m going to leave this page because I don’t want to save that. I already had a citation file. I’ll go to my dashboard, because my dashboard is where all of my draft uploads are. You see the tests that we used before. But you also see the Zenodo, the why, what, and how presentation. And you see that this is still in draft stage. So this is a draft. It’s marked as a draft. It has a red upload file instead of this green tick, which means that it’s probably available. So I’ll go there and do edits. And so here you see I already uploaded the slides so that you don’t have to wait for me waiting for things to be uploaded. But again, you don’t have to upload your slides in order to get this DOI. So we saw that in the test form. So I can just copy paste that. And I can go to the slides. And then I can copy paste this DOI into the slides. And I tend to put that onto any of my slides, just in case someone wants to reuse just a single slide. I tend to just put that DOI into all of them. Yeah. So what we’ll do now is we’ll upload this version of the presentation that I made and publish it so that we actually have a working DOI at the time where you’ll be watching this recording. So I checked this deposit carefully. So I very carefully filled out the basic information. It’s a presentation. The title is Zenodo, Why, What and How. Publication date is today. This is me. I’ve put in the description. Thanks, Reshama, for helping with the description here because that’s all your work and not mine. So thanks for making my life a lot easier for the description. And I’ve added some keywords to make it more visible. I’ve added the language. But I did not add any of the other identifiers. So I kept everything else here. I kept that empty. This is not part of conference. Well, I could actually put in a data umbrella. I might do that later because it is part of a webinar series. So that would be good to link back to that to make it more clear what this output is actually about.
All right. So that’s what the upload form looks like. I am now just going to publish this. And then again, the warning, you can’t change the files. You can update the records metadata later. So I might do that. I add Data Umbrella there. I press publish. And now the slides are available. And no one has viewed them yet. Yeah. So this is what that then looks like. And now, and it might take a couple of seconds, but now if you actually use this UI in my presentation slides, so if we go back to the presentation and I will go open the link. Ah, because of my cookie history is probably still saying, “DOI not found.” So this might take a couple of seconds. It’s also good to remember if you’re uploading a presentation on the note of five seconds before you do the presentation, you might want to do it a little bit longer. But in general, it should work almost immediately. Maybe I can open it in Chrome actually. Maybe then it, I did not install Chrome on this laptop. So we’re going to go to Microsoft. Let’s see if that works. And let me copy paste that. copy this link. And then I’m hoping. No. Okay. So it will take longer than a couple of seconds, but it is really there. So hopefully, when you watch this recording, you will not see this DOI not found window anymore. But you will see the actual upload here. And then you can download the slides here. And because there’s a CC by 4.0 license attached to it, which you can see here, feel free to reuse any of the slides and to use that for your own purposes.
1:11:50 Resources
And with that, I think I would like to conclude with a couple of resources from other people that you can also watch. And perhaps they explain more clearly how you can use the notice to upload your research, as well as some information in Spanish, which I don’t master. So this is why the presentation is in English. But if you prefer to have that information available in Spanish, there’s different resources available to you. And I think with that, that’s what I wanted to show. But perhaps you have some questions or clarifications or other things you wanted to know from Zenodo that we know.
Reshama:
Esther, thank you so much for your presentation. We have a very comprehensive presentation. And when the video is posted, we will link to your Zenodo slides. And in the past, we haven’t done that. Sometimes we just link to Google Slides, which you never know that might be deleted or access might be changed. So we will link to your Zenodo slides in the video description.
1:12:48 Q: Where can we find the images/illustrations used in your presentation?
Reshama:
I do have one question, which is, I love the illustrations that you showed in your presentation from The Turing Way. And can you show us where people can find them on Zenodo? I notice you link to a DOI on Zenodo, so I assume that’s where they are.
Esther:
Yes, indeed. And that’s why I skipped my thank you slide because I actually wanted to thank The Turing Way community for all of these images, indeed, in my slides, which you can also reuse for any purposes because CC by license, as long as you cite them, which is why I indeed refer to them in my slides, saying something along the lines of, let’s see, where’s an image? Should not take me long to find one. Yes, the data repository tree. So as long as I refer to this
image, where it’s available on Zenodo, let’s see if that link clicks. I think they don’t allow that for the preview versions of Zenodo outputs. But here you can see illustrations from The Turing Way shared on the CC by 4.0 for reuse. And here you can find all of these images, which are very strange backgrounds for me, and it should probably be white instead of black. But yeah, here you can now see all of these images on Zenodo. And you can now preview them separately here. This looks more like what I would be expecting with the white background. I think that’s probably because my computer is on dark mode or something.
But yeah, this is how you find them on Zenodo. You can also, again, go to previous versions, because every time there’s a new version released, I think what that looks like is also here that you can go to previous versions. But that’s how you can find them on Zenodo. For some of them, it will be easier to go to The Turing Way. So that’s book.thetouringway.org with what’s that little stripe called again? Sorry, I keep confusing that. But these little separations in the link. But if you Google The Turing Way, it’s also the first hit. So that’s where you can also find, for example, the data repository image should be somewhere in research data management. Data repository, where do we put that? Here, the one above. And there you can then also find them. So for some of it, it will be easier to directly copy paste it from the actual book instead of browsing to Zenodo, which if I go back, did I use that here? Yeah. So it’s not that great to browse through it on Zenodo. One of our community members is actually working on it with our shiny app tool to make this a little bit more browsable and also search only for keywords, et cetera. But it’s not yet there. Something very, very much needed. Anyway, rambling on too much about The Turing Way. I’m very excited about The Turing Way.
1:16:16 Q: How does Zenodo prevent people from uploading spam?
Reshama:
Thanks, Esther. I have another question, which is how does Zenodo, and I don’t know if you’re the right person to ask this too, but how does Zenodo prevent
people from uploading spam?
Esther:
It doesn’t necessarily prevent people from doing that, but it will remove things that are not related to scientific output. So I’ve never encountered spam, but indeed, basically anyone, as long as you make an account and you fill in the mandatory fields, you can put up that spam, but there are some monitoring going on which will have that removed, because otherwise, if we go to the main page, otherwise this page would probably be flooded with people trying to spam it. But there’s a mechanism in place, but I’m not 100% sure about the details, unfortunately. Okay. And I guess also if people connect their GitHub or their fork ID, then that is a verification that it is legitimate content that people want to share. So that probably helps as well. Yeah. Exactly. Imagine. Okay.
Reshama:
And that is, thank you for being patient with all my questions along the way. And that is the end of my questions. So thank you so much. This recording is going to be up soon. If you have any questions, please ask on the video description. There’s a comment section, and we will be in touch with Esther to get those questions answered. Thank you so much, Esther. Thank you.